| Previous | Main | Up | Next |
|
|
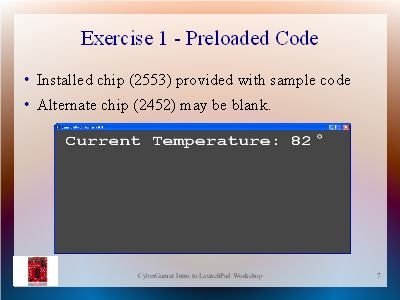
This exercise simply connects the board to your computer and runs the temperature demo which Texas Instruments has already programmed into the processor.
For this first exercise we'll use the code already on your chip. TI programs this into the chip at manufacture.
Your 2nd chip, the 2452, is blank.
For the workshop participants, IAR Embedded Workbench was already installed on the provided laptops. This installed the necessary drivers. For those reading this web page version, skip ahead to the extra notes and install the application.
To run the temperature demo application on a Windows computer without installing a development environment, download slac435 from the Texas Instruments site and run the driver installer found in "slac435c\MSP-EXP430G2-Launchpad User Experience\driver".
Connect your LaunchPad to your computer using any USB port. If the Windows new hardware wizard fails to install the appropriate drivers, then download the zip file from the link in the previous paragraph and run the driver installer.
On your LaunchPad you should see the two user LEDs flashing. They are located near the bottom edge of the board. Press the user button on the LaunchPad. This is the left button labeled "P1.3" on the board. The LEDs should stop flashing.
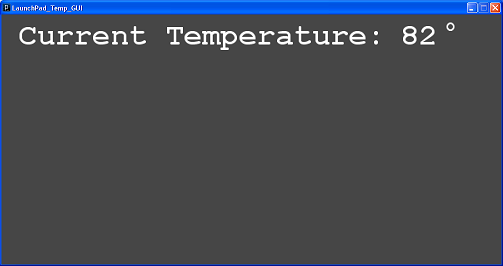
For the workshop participants, the temperature GUI was placed in a folder on the desktop. For those reading this on line version, download slac435 from the Texas Instruments site and copy the directory "slac435c\MSP-EXP430G2-Launchpad User Experience\bin\LaunchPad_Temp_GUI" to your desktop, then double-click on the "LaunchPad_Temp_GUI" executable found in that directory. This is a Processing application. Learn more at http://processing.org.
Discuss Processing. Good place to start if you are new to software. It's also used by Arduino for their IDE and many example applications.
The application starts, opening a DOS style window and directing you to select the COM port the LaunchPad is connected to. The correct port should be the last one. Select the port by pressing the appropriate number key and then the enter key on your keyboard. This is a text application, so the mouse won't work. When you press the number key it does not print on the screen so there is no feedback. Should see the temperature displayed as shown below.
|
If you don't see the temperature then close the application (click on the red box in the top right) and restart the GUI application.
Clicking the user button sets a baseline temperature. The red LED blinks as this temperature is exceeded (the chip will warm up as it runs). The green LED blinks when chip cools down below baseline temperature (put something cold on it). This reports the temperature of the chip, not room temperature.
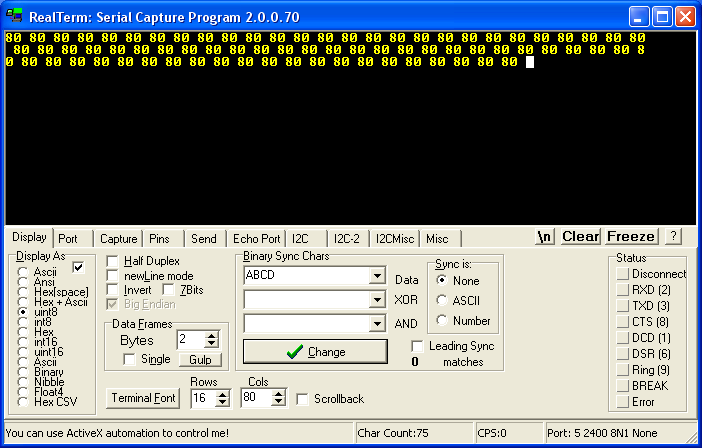
The temperature is output to computer as integer, not ASCII, so you need to use an application that will display the binary value. Quick discussion of binary and ASCII. ASCII and other formatting can add a lot of code and complexity to your project.
This example keeps communication simple, and unidirectional. Extending this with bidirectional communications would be a good starting project to learn Processing and the MSP430.
You can see the output from other applications. Use a serial terminal program that can display raw binary. One example of this is the RealTerm application. You can't use HyperTerm because this does not support binary output. Set the terminal to 2400-8-n-1.
|
On to the second exercise - learning how to load the code already programmed into the chip.
| Previous | Main | Up | Next |